English    |    Français

OneScreen

OneScreen Solutions provides interactive touchscreen displays that integrate video, audio, and interactive.

  • Facilitates screen sharing, annotation, and recording.
  • Allows for touch-based interaction with  documents, presentations, and websites.
  • Designed to work with various operating systems (Windows, Mac, Android, iOS, Chrome OS) and existing hardware. 
  • Offers cloud-based multi-device management and messaging capabilities. 
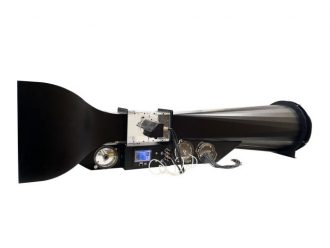
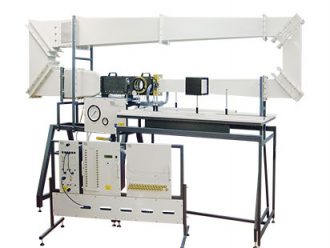
  • Matrix Wind Tunnel 125Read more

    Matrix Wind Tunnel 125

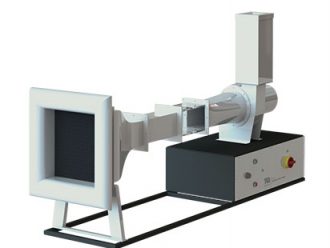
  • TecQuipment Bench-Top Wind Tunnel - AF1125Read more

    TecQuipment Bench-Top Wind Tunnel – AF1125

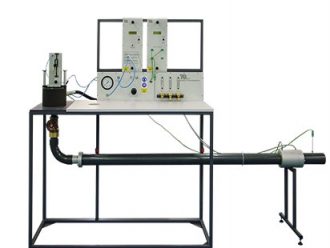
  • TecQuipment Laval Nozzle Pressure Apparatus - AF27Read more

    TecQuipment Laval Nozzle Pressure Apparatus – AF27

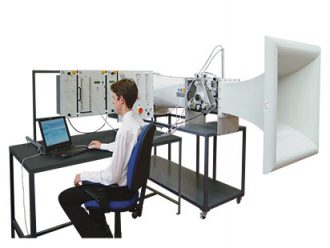
  • TecQuipment Subsonic Wind Tunnel - AF1300Read more

    TecQuipment Subsonic Wind Tunnel – AF1300

  • TecQuipment Supersonic Wind Tunnel - Intermittent - AF300Read more

    TecQuipment Supersonic Wind Tunnel – Intermittent – AF300

Continue reading

Frequently Asked Questions about Living Cultures

Many of you have questions about ordering and caring for cultures of protozoa, protists, and bacteria. We’ve gathered the most frequently asked questions here, along with the answers, as a quick reference. While it should answer most common questions and concerns, organism-specific information can be found in the instructions shipped with the culture and by searching our Carolina™ Care Sheets. Mitosis

Protozoa and protists

“When should I order protozoa?”

A living culture should be ordered a couple of days before use. We recommend receiving it on a Tuesday, Wednesday, or Thursday and using it the same week if at all possible. Try to arrange delivery at a time when you can personally receive the package and examine its contents. Inform your institution’s receiving department or office personnel to contact you immediately once it arrives. If you can’t get to the package right away, have someone place it in a climate-controlled area—NOT in a refrigerator—until you can attend to it.

“How long will my protozoa survive in the shipping container?”

Protozoa and algae cultures will survive for about one week in the shipping container. When you receive your protozoa culture, remove the lid and gently aerate the culture using a clean pipet. Allow the culture to settle after aeration and then use a stereomicroscope to check for activity. Replace the lid and set the culture in an area away from direct sunlight or extreme temperature changes.

  • For Euglena, make sure the cap is loose and place the container in a well-lit area, but not in direct sunlight.
  • As a rule of thumb, don’t place a protozoa, algae, or bacteria culture in the refrigerator. Exceptions are particular cultures of fungus that should be refrigerated to slow their growth, and when the instructions specify that refrigeration is an acceptable means of storage.

“How can I extend the life of my protozoa if I don’t want to subculture them?”

We recommend using the culture within 5 days of receipt. However, the life of your protozoa can be extended by feeding and by replenishing the culture water. For organisms that feed on bacteria, a single grain of precooked rice can be added to the culture container. Some organisms require algae or other food sources; be certain to research what food the organism requires prior to ordering. To replenish the culture water, allow the organisms to settle to the bottom of the jar, and then gently pour off about a quarter of the water and replace it with fresh springwater. Never use tap or distilled water.

“Some of the water from the culture container spilled (or evaporated) and I want to add more water. Can I just add some tap water? What kind of water is best?”

Never add tap water to a culture. It contains chlorine and in some cases chloramines that are toxic to protozoa, algae, and other living organisms such as fish and tadpoles. Use room temperature springwater instead. We recommend Carolina™ Springwater, which we use to grow many of our organisms. If this is not an option, you can purchase springwater from your local grocery store. Be sure to carefully read the label to ensure there are no additional additives for taste, and that the source is not a municipal water supply. The label should state that the water came from a “natural springwater” source.

“What types of microscopes can be used to view live organisms?”

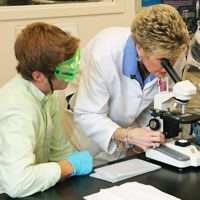
For protozoa and algae use a compound microscope for close, detailed viewing. To observe swimming and interactions with other organisms within the culture, use a stereomicroscope. Use a compound microscope with an oil-immersion objective to view bacteria and fungus.

“What are the ingredients of Alga-Gro® media?”

Alga-Gro® media are proprietary mixtures; therefore, we do not disclose specific information about the amounts or types of ingredients they contain.

“What is the enzyme concentration?”

Enzymes do not have a specified concentration like chemicals do (e.g., 3% hydrogen peroxide) they have an activity level. The activity level varies with each enzyme. If you need to know the activity level of a particular enzyme, call our Customer Service Department (800.334.5551); and ask the representative to connect you with a technician in our Cultures Department  for this information.

“What types of organisms will I see in the Carolina™ Pond Mystery Mix or the Hay Infusion Kit?”

The number and types of organisms vary from culture to culture. Remember to always use springwater when setting up a culture; do not use tap or distilled water. It takes time for organisms to appear and become abundant, so allow at least one to 2 weeks for organisms to grow and emerge.

How to maintain algae in your classroom:

Do

  • Keep at room temperature (22° C or 72° F)
  • Loosen caps on tubes or jars and keep upright
  • Use sterile culture vessels and pipets
  • Use within 5 days of receipt or set up subcultures after 5 days to maintain longer
  • Provide correct light intensity (indirect sunlight or artificial light)
  • Read the Carolina™ Culturing Algae Manual—included with each order of algae and available separately

Don’t

  • Put in the refrigerator
  • Put in direct sunlight
  • Wash glassware in detergent
  • Keep above 30° C (86° F)—lethal to algae

Bacteria

Do I need to place my bacteria cultures in an incubator when I receive them?” The short answer is no, not every bacteria culture needs to be incubated. The temperature listed on the label is the temperature at which the culture would optimally grow if you were growing it in subculture. Most bacteria store well at room temperature and will remain viable for 3 to 4 weeks. Of course, there’s always the exception! Spirillum volutans needs to be kept at 30° C.

“Can my students get cancer from using Agrobacterium tumefaciens in the Carolina™ Plant Cancer Study Kit?”

No, they can’t. The cancer seen in susceptible plants is the result of a bacterial infection that is specific to plants, not humans. Susceptible plants include roses, grapes, apples, cherries, pecans, sunflowers, tobacco, beets, turnips, and tomatoes.

“Do I have to use a fresh, 24-hour culture of bacteria to perform a Gram stain?” Yes, you do. As the culture ages, the bacterial cell walls become more permeable to the crystal violet-iodine complex, making the cells easily decolorized. This will cause Gram-positive bacteria to stain negative.

Mohawk College Prepares for the Future

(Originally Published in the Bosch Rexroth Canada Newsletter)

Technology is changing at a rapid rate and institutions of higher learning must keep pace to remain relevant in this changing industry. Mohawk College in Hamilton, ON has risen to this challenge by partnering with Bosch Rexroth Canada to keep up to date with technological changes in the manufacturing industry.

The relationship between Mohawk and Rexroth began in the mid 80’s, when the Fluid Power Program was developed with the aid of training systems and curriculum from Rexroth. This original training hardware has served over 6,000 students at the college over the past 30 years. Recently, Mohawk College recognized that it was time for a technology update and reached out to Bosch Rexroth Canada to supply new hydraulic and pneumatic training systems.  This will ensure that the students at Mohawk College learn on equipment from the leading edge technology supplier in the industry.

These new systems will facilitate training on manual, electrical, and PLC control of hydraulic and pneumatic systems. The hydraulic training systems will also accommodate open and closed loop proportional position control and are expandable to additional technologies to facilitate future program growth. All of these changes are in anticipation of the fourth industrial revolution which will create a gap in the industry. Bosch Rexroth, an industry leader, has partnered with Mohawk College to ensure that they are adequately prepared to help fill the gap that will be created.

AYVA is proud to partner with this best-in-class manufacturer to provide industry-grade training systems to Canadian Colleges and Universities.  Our President, Dianne Beveridge, will be traveling to Stuttgart, Germany next week to visit Bosch Rexroth’s Drive and Control Academy and to attend the Trade Fair Didacta.  Stay tuned for updates on her visit!

Pictured above are the Bosch Training Stands at Mohawk College.

How to Handle, Store, and Repair Microscope Slides

Carolina™ prepared microscope slides provide an essential component for the in-depth study of botany, zoology, histology, embryology, parasitology, genetics, and pathology. After receiving your slides, proper care will keep them in good condition and make them last as long as possible. In the following paragraphs, we’ll discuss the handling, storage, and repair of prepared slides.

Handling

Teach students proper slide handling and slides can be used year after year. Slides should be held by the edges, avoiding the cover glass area. Always begin viewing a slide using the microscope’s lowest magnification. This reduces the risk of contact by the microscope’s objective lens. Afterwards, switch to a higher magnification if needed.

Keep the microscope’s objective lens and other objects from coming into contact with a slide. Pressure on the cover glass can cause it to break or loosen. When finished viewing, remove the slide from the microscope and place it in its storage container. Leaving the slide on the illuminated stage for extended periods of time can cause fading and other damage.

When slides get soiled, you can clean them with soapy water or isopropyl alcohol. Do not immerse slides in water or soak them in it. This loosens the cover glass adhesive, causing the cover glass to come off and possibly ruin the slide.

Storage

To keep your prepared microscope slides in good condition, always store them in a container made for the purpose and away from heat and bright light. The ideal storage area is a cool, dark location, such as a closed cabinet in a temperature-controlled room. Stained slides naturally fade over time. Keeping them in a cool, dark location helps slow down the process.

Slides should be kept horizontal (flat) with the specimen side up. If they are stored on edge, the cover glass or specimen may shift out of position. Take care not to stack slides on top of one another or apply pressure to the cover glass.

Repair

Common problems include a broken slide or cover glass, bubbles in the mounting agent, and specimens shifted to the edge of the cover glass. If a slide or cover glass is broken, dispose of it and replace it immediately to prevent anyone from being cut. The adhesive used to attach a cover glass to a slide is applied as a liquid. As the liquid dries, it only hardens around the edges of the cover glass. With rough handling this seal can crack or loosen, allowing the liquid to ooze out. You can fix a broken seal by applying a small amount of fresh mounting media to the break. Clear nail polish sometimes works if you don’t have any mounting media handy.

Most slide repairs require some amount of skill. Often it is easier and more cost effective to replace the slide rather than to repair it.

Saudi Electricity Company

Electrical Engineer, Ryan Langdon and Export Manager, Adnane Rifai, headed to Dammam in Saudi Arabia for the installation, commissioning and training for the Electrical Power Systems.

TecQuipment supplied the Power Systems Trainer (PSS1).

Which Electrophoresis Kit Is Right for You?

Use this companion guide to compare kit characteristics so you can prepare yourself and your lab accordingly.

Electrophoresis of DNA is a fundamental technique in biotechnology that covers a variety of subject material on the structure and function of DNA. Carolina makes the study of electrophoresis attainable for any classroom by offering a number of kits that include valuable teacher resources.

Use this guide to compare kit characteristics so you can prepare yourself and your lab accordingly. No matter what your needs are, we have the right kit for you. If you already use Carolina kits, you might discover a new kit to try with your students!

Type of Samples # of Samples Restriction Digest Required Type of Enzyme Restriction Type of Stain Equipment Included
Beginner Kits
Exploring Electrophoresis of Dyes dyes 6 none none
Best for teaching: The Principles of Electrophoresis.
Scenario: Use dyes and subject them to electrophoresis to determine their relative size.
Exploring Electrophoresis and Forensics Kit DNA 4 none CarolinaBLU
Best for teaching: The Principles of DNA Fingerprinting.
Scenario: Analysis of crime scene whereby DNA evidence is collected from the crime scene, victim and two suspects.
Exploring Electrophoresis of DNA DNA 3 none CarolinaBLU
Best for teaching: Demonstrate the action of restriction enzymes on DNA.
Scenario: Analyze banding pattern of pre-digested DNA when compared to uncut DNA samples after electrophoresis.
Introductory Gel Electrophoresis dyes 8 none none
Best for teaching: The Principles of Electrophoresis.
Scenario: Use dyes and subject them to electrophoresis to determine their relative size.
Type of Samples # of Samples Restriction Digest Required Type of Enzyme Restriction Type of Stain Equipment Included
Intermediate Kits
Nature’s Dice – A Genetic Screening Simulation DNA 24 lyophilized CarolinaBLU
Best for teaching: Mendelian genetics and inheritance, using molecular biology.
Scenario: Perform and analyze a genetic screen on a fictitious family tree. Discover either an Autosomal Recessive or Sex Linked Trait.
Exploring Restriction Analysis and Electrophoresis of DNA DNA 4 lyophilized CarolinaBLU
Best for teaching: Demonstrate the action of restriction enzymes on DNA.
Scenario: Setup restriction digests of lambda DNA using three different enzymes. Separate the digested samples by electrophoresis and analyze.
Restriction Enzyme and DNA DNA 4 lyophilized CarolinaBLU & GelGreen
Best for teaching: Restriction Analysis of Bacteriophage DNA.
Scenario: Lambda DNA is digested using three separate enzymes and analyzed.
DNA Restriction Analysis DNA 4 wet CarolinaBLU & Ethidium Bromide
Best for teaching: Restriction Analysis of Bacteriophage DNA.
Scenario: Lambda DNA is digested using three separate enzymes and analyzed.
Restriction Mapping of Plasmid DNA DNA 4 none CarolinaBLU
Best of teaching: Restriction Mapping of a Plasmid using DNA fragments.
Scenario: Use restriction analysis to piece together a plasmid map from digested DNA fragments.
PCR Forensics Simulation DNA 6 none CarolinaBLU
Best for teaching: Demonstrating the concepts of DNA fingerprinting and PCR.
Scenario: Use a real world scenario to solve a crime by analyzing two loci in a DNA fingerprint.
Outbreak! Fingerprinting Virus DNA DNA 3 none CarolinaBLU
Best for teaching: DNA Analysis of fictional virus.
Scenario: Play the roles of epidemiologists and identify an unknown virus strain using electrophoresis and fragment analysis.
Restriction Enzyme Cleavage of DNA DNA 3 none CarolinaBLU
Best for teaching: Concepts of electrophoresis and restriction enzymes.
Scenario: Perform an electrophoresis with predigested samples with respective enzymes and analyze results. Determine fragment size, calculate relative mobility and use drylabs in this classic lab.
Fast Gels DNA 6 none CarolinaBLU
Best for teaching: Electrophoresis in 15 minutes, using a real world scenario!
Scenario: Choose from two impactful scenarios: Fish DNA fingerprinting or Colon Cancer Testing.
Type of Samples # of Samples Restriction Digest Required Type of Enzyme Restriction Type of Stain Equipment Included
Advanced Kits
Forensic DNA Fingerprinting DNA 4 wet CarolinaBLU & GelGreen
Best for teaching: Advanced techniques in forensic DNA fingerprinting and analysis.
Scenario: Perform plasmid isolation, restriction analysis and electrophoresis of samples taken from a “crime scene” then compare the DNA profiles for a match.
Restriction Mapping of Lambda DNA DNA 3 wet CarolinaBLU
Best for teaching: Restriction Mapping of Lambda DNA using restriction enzymes.
Scenario: Assemble a map of the lambda virus using fragments of DNA digested with three different restriction enzymes.

3 things to consider before you purchase electrophoresis kit(s)

1. What equipment do I already have available?

Before performing electrophoresis, consider what type of equipment (if any) you have available. Whether you have equipment from our biotechnology line or none at all, we have a kit for your classroom. Look for a checkmark in the “Equipment Included” column.

  • All of the electrophoresis kits we sell are compatible with our biotechnology equipment.
  • Our Exploring Electrophoresis kits include all of the equipment and materials to run an electrophoresis.

2. Which electrophoresis topics do I want to teach?

Our labs cover numerous topics within electrophoresis, including the basic principles of electrophoresis, restriction enzymes, DNA fingerprinting, and PCR. Kits may include a combination of these subjects. Check out the “Best for teaching” recommendation.

3. What skill level are my students?

Consider both skill level and appropriateness of subject matter when choosing a kit. For instance, if your class has loaded undigested DNA and run an electrophoresis, but has not performed a restriction digest, choosing a kit that requires students to piece together a plasmid map from DNA fragments will not be a good fit. A kit that requires you to run pre-digested samples and discuss the action of restriction enzymes on DNA would be an appropriate kit to develop your students’ skills. Look for kits in the appropriate skill level section for your class.

Kit scenarios

You may also want to consider the investigative scenario demonstrated in each kit. Many of our kits offer real-world scenarios. Students can play a forensic scientist recreating a crime scene, an epidemiologist investigating the origin of a virus, or a medical professional tracking heritable diseases, to name a few. Using this criterion can be especially helpful when you’re covering cross-curricular concepts–a forensics class with the crime scene scenario, for instance, or a statistics class with the epidemiological scenario.

Choosing the right type of DNA stain has implications on the equipment you’ll use, and more importantly, your and your students’ safety. Carolina offers ethidium bromide-free alternatives such as the CarolinaBLU™ and GelGreen™ dyes that use a white light box and LED blue transilluminators, respectively.

Check out our free video resources for a how-to guide on preparing and pouring a gel and loading a gel for electrophoresis.

TecQuipment’s 60th Anniversary Partner’s Conference


Can you spot our Sales Director Fazal Mulla at the British Space Museum?

AYVA traveled to England this week for a Global Partners meeting at TecQuipment.  Fifty-two people from more than 30 countries gathered in Nottingham to watch the FIFA championship before kicking off a week of product training and planning.

TQ showcased several new products including an expanded range of Flow Channels for teaching and research labs, the new Power Systems Simulation Training Modules and the latest refrigeration and air conditioning trainers – to name just a few.

The AYVA Team enjoyed networking with our counterparts from around the world and spending time with new and old acquaintances at TQ.  A big thank you goes out to our hosts for hosting this world class event.

Owl Pellets in the Classroom: Safety Guidelines

The dissection of owl pellets can provide a valuable learning experience for students at all grade levels. The following guidelines will help to ensure that this activity is done in a safe fashion.

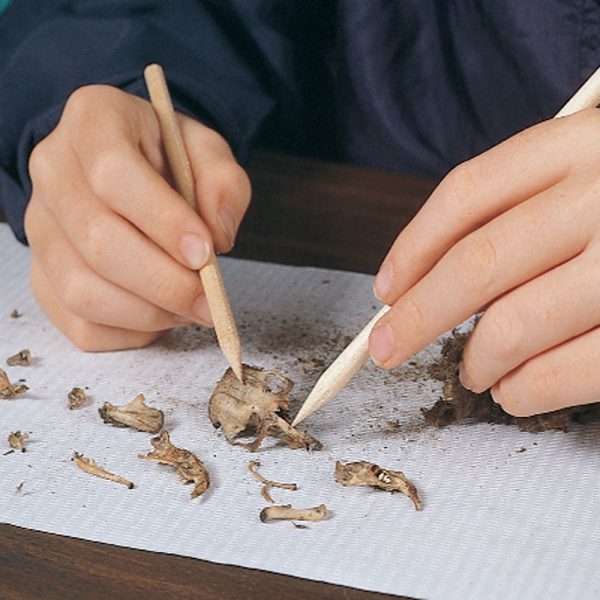
Owl pellets contain the remains of small animals that the owl has ingested and can be a source of bacterial contamination. Carolina’s individually wrapped owl pellets are heat sterilized at 250º F for 4 hours to eliminate most bacteria, including salmonella bacteria. We do not treat them with chemicals. Keep them wrapped until time to use, to prevent insect infestations or contamination.

Supervise dissection activities.

A teacher or other adult(s) must oversee students’ owl pellet dissection activities to ensure that they perform the activities safely.

Complete dissection activities in one day.

Afterwards, promptly dispose of the owl pellets, plus all disposable materials used in the activity, and remove them from the classroom.

Handle owl pellets, even sterilized ones, as though they could be a source of bacterial or viral contamination.

This is good advice for any and all lab work involving biological materials. The students should learn the importance of good laboratory practices. It will serve them well throughout their academic career and beyond. Caution in the form of good laboratory practices is of great importance whenever one is working with biological materials or chemicals.

Do not use food consumption areas for owl pellet activities.

Owl pellets are not to be dissected in school cafeterias or other food consumption areas. Covering laboratory or classroom tables with an impermeable, disposable material such as aluminum foil will greatly diminish the likelihood of microbial infections. Also use disposable trays, paper, or plates as work surfaces for dissection of the pellets, and dispose of them promptly upon completion of the activity.

No eating or drinking in the dissection area!

During the activity, students must not be allowed to use drinking fountains or get water from sinks for drinking. Eating and drinking should take place before the activity or after the student has completed the activity and thoroughly washed his or her hands, and should take place outside the dissection area.

Use gloves and wash hands.

Give students disposable gloves and instruct them in how to use the gloves properly. Students should also be instructed to keep their hands away from their faces during the activity, and not to touch other surfaces and items away from the work surface and materials. Students should be shown that, when removing gloves, they must avoid skin contact with the exterior of the glove. Common practice is:

  1. Remove the first glove by grasping the cuff, taking care not to touch bare skin, and peeling the glove off the hand so that the glove is inside out.
  2. Remove the second glove while holding the inside of the first in the ungloved hand.
  3. Drop both into the disposal receptacle.

Immediately after the activity and after glove removal and disposal, students must thoroughly wash their hands with soap and warm water, rubbing them with lather for at least 20 seconds before rinsing (as recommended by the U.S. Centers for Disease Control and Prevention—see http://www.cdc.gov/cleanhands), and should dry them with clean paper towels. Be sure sinks are available and well stocked with soap and paper towels. A good antimicrobial foaming skin cleanser for use with water is BactoShield® by Steris. A waterless hand sanitizer can also be a very effective antimicrobial agent if it is comprised of at least 70% alcohol. This can be used in addition to hand washing or, if soap and water are simply not available, in lieu of hand washing (though hand washing is preferable). Do not use a waterless hand sanitizer that does not have this high alcohol content.

Owl pellet dissection provides a good opportunity to teach skills that will serve students well in their academic careers and, for some, in their professional careers or in volunteer activities. They can learn the importance of, and how to use, personal protective equipment (gloves in this instance) and how to protect themselves from microbial infections. Note: Latex gloves can cause allergic reactions in some individuals. Carolina recommends disposable vinyl exam gloves (such as Carolina’s items 706348, 706349, or 706350), or, for this activity with sterilized owl pellets, polyethylene gloves may be used (such as Carolina’s items 706345, 706346, or 706347).

Collect dissection tools, trays, etc., immediately after the activity.

Allow students to use only the tools provided; do not allow them to use pencils or other personal items that they will maintain in their possession after the activity. If possible, use disposable dissection tools and then throw them away. Otherwise, immediately sanitize tools using a bactericidal and virucidal cleaning agent according to its instructions, or by soaking the tools for 2 hours in a 10% household bleach solution or in 70% ethanol.

Wash and sanitize work surfaces immediately after the dissection activity.

Use a cleaning agent that is bactericidal and virucidal, and use according to label instructions. Alternatively, 70% ethanol may be used (be aware that it is flammable), or a 10% household bleach solution makes an effective sanitizing solution (be aware that chlorine bleach is corrosive and irritating to skin and may damage clothing). Use disposable paper towels and throw them away. Do not use sponges or rags that might hold and spread bacteria or viruses. After the students have washed their hands, sanitize the sinks and surrounding surfaces.

Owl pellet dissection is a safe and rewarding activity.

Through this investigation students learn about the food chain and the diets of owls. This activity also provides an opportunity to learn about safe laboratory practices and the importance of taking precautions. We want to reiterate that the owl pellets sold by Carolina have been heat sterilized. This would be expected to eliminate the risk of microbial infections such as salmonellosis. Just as is always advised when working with microbes in the lab, though, we need to assume that owl pellets could be infectious. We need to use good and prudent safety practices to minimize the possibility of any sort of microbial infection. Using sterilized owl pellets and enforcing safe practices make owl pellet dissection a safe and rewarding activity.

Top Five Greatest Engineering Education Challenges

Originally published on TecQuipments’s website – May 2018.

In this blog post, Dr Ben Simpson, Senior Lecturer in Mechanical Engineering from Nottingham Trent University looks at the changes in engineering education over the last 20 years, and the importance of a greater emphasis on bringing theory into practice through a practical based learning approaches.

Engineers are being asked to be evermore inventive, to solve progressively more complex challenges with increasingly more eloquent solutions. Therefore, there is a requirement for engineering undergraduates to be adaptable, agile in thought and occasionally be able to think differently.

A complex picture, where to begin…

There has been a decisive change in engineering education over the last 20 years. A transformation from an intense mathematical and theoretical study approach to a more practical approach with an emphasis on design.
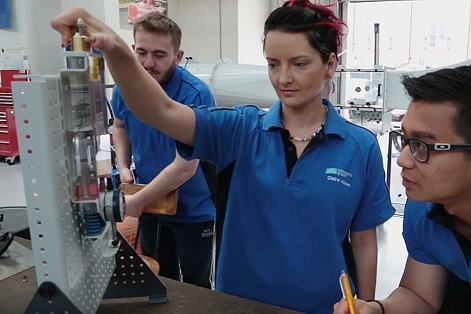
Furthermore, governments are beginning to influence policy in tertiary education through new initiatives, such as the Tertiary Education Framework (TEF) in the UK. The emphasis from government is on rewarding institutions that are more innovative in their teaching approach, for example, through building closer relationships with industry and improving student experiences. However, when developing engineering undergraduate courses for tomorrow’s engineers there is an increasing number of complex and sometimes conflicting challenges. Five of the greatest challenges are:

  1. Gaining a competitive edge The increasingly competitive tertiary education sector has left every educator seeking points of differentiation for their programs in order to attract students.
  2. Engaging and retaining students Approaches to learning can be described in terms of the what (the value of what is being learnt), the why (the motive for learning) and the how (the strategic approach taken to learning). In a more general sense, educators discuss both surface and deep approaches to learning. A surface approach is adopted by a student who sees little value in the learning material and their motivation is simply to reproduce information to meet the demands of the course and to get a pass mark. A deep approach to learning is adopted by a student who sees great value in the knowledge they discover for continual mental growth and change. The student is motivated to make sense of and to find meaning in the information they receive and they seek to relate the new knowledge to previous knowledge and apply it to everyday experiences. So how can students be encouraged to fall in love with their subjects and intrinsically adopt a deep learning approach?
  3. Growing classroom sizes In many markets around the world, including the UK, there continues to be a shortage of engineers1. This often leads to larger class sizes, especially as universities seek resource-saving synergies such as shared first year modules.
  4. Adapting to a changing world The maturing information and cyber ages are having significant impact on both educational approaches and engineering practice. How do educators adapt the learning environment to account for and take advantage of these changes?
  5. Meeting employer’s needs  Increasingly engineering undergraduates are finding employment with small to medium size enterprises2. Employers are calling for graduate engineers to be innovative, self-motivated and creative problem solvers, as well as possessing up-to-date knowledge and skills.

How can tertiary educators develop courses that can meet these challenges?

What is your teaching philosophy? As it turns out this is a very important question since our teaching philosophy is the foundation of our teaching practice. It is also a loaded question since there is no perfect philosophy and our teaching methods are often constrained by many factors including time, resources and the current political will of our parent institution.

What can be agreed upon is that engineering is a very hands-on discipline and so engineering educators have naturally adopted teaching methods that encourage the student to do something. For example, laboratory sessions are common in most engineering modules. The philosophy of ‘doing’ can be found at the heart of many learning approaches such as active learning, blended learning, project based learning, problem based learning, discovery based learning, and experiential learning. All these ideological approaches have their roots in constructivism. When applied to education, constructive approaches focus on helping students build knowledge by making meaning between their experiences and their ideas. However, before we get lost in the confusing and often unproductive world of educational ideologies, let us review some methods that may be able to meet the challenges outlined before.

One framework that has been scrutinised and demonstrated to work in an engineering environment is learning cycles. There are a number of learning cycles proposed in the literature but they share many similarities. The cycles generally involve some or all of the following steps:

  1. Initial engagement The students must be inspired to want to learn the subject. This may be achieved through mini lectures (no more than 20 minutes) which include some fundamental concepts, demonstrations and authentic industry based examples.
  2. Knowledge exploration Based on the student’s current knowledge, the students are allowed to explore a topic. It is probably wise to offer guidance to students exploring a topic. In the information age, many uncollaborated sources of information are accessible through search engines.
  3. Action Design, build, report. The important aspect of action is to apply the learnt knowledge and skills. This is commonly performed in a graded assessment.
  4. Reflection It is important that the students reflect on what they have learnt and how their new knowledge fits with previous knowledge. Reflective exercises can also help the students express what they still do not know and help them develop more sophisticated problem solving strategies.
  5. Application It is important that the cycle be completed by giving the students opportunities to apply their new knowledge and test their new strategies.

In combination with learning cycles, engineering educators seek to set challenges based in the real world.
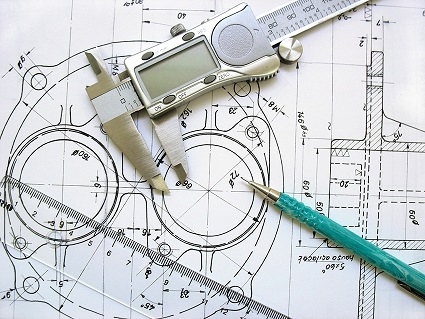
When possible the students can be encouraged to develop creative and innovative solutions and to communicate clearly their strategies and outcomes. Despite this learning approach having many benefits there are also many challenges. Tutors often find that the high resource and contact time requirements are prohibitive, especially with large class sizes. Furthermore, a practical based learning cycle approach may require new assessment items and other supportive documentation to be prepared by time poor academics. So for many the continuation of lecturing, tutorials and laboratory sessions is the only option that can be prepared by the start of term.

However… with some inventiveness maybe some of these challenges can be overcome. For example, tutors could encourage peer-to-peer learning, invite industry collaborates into the classroom to mentor, and create learning environments that help students understand their limitations and allow them to learn at their own pace.

It is clear that there is no magical concept that will suit all educational scenarios. So maybe in the future engineering educators will be required to be more like their graduates. They will need to be adaptable, agile in thought and to occasionally think differently.

– Ends –

References:

  • Engineering UK 2017 – the state of engineering. Engineering UK report.
  • Business population estimates for the UK and regions 2017, Nov 2017. Department for Business, Energy & Industrial Strategy.

Milton Keynes College Takes Off with the TecQuipment AF1300 Wind Tunnel

Originally published on TecQuipments’s website – May 2018.

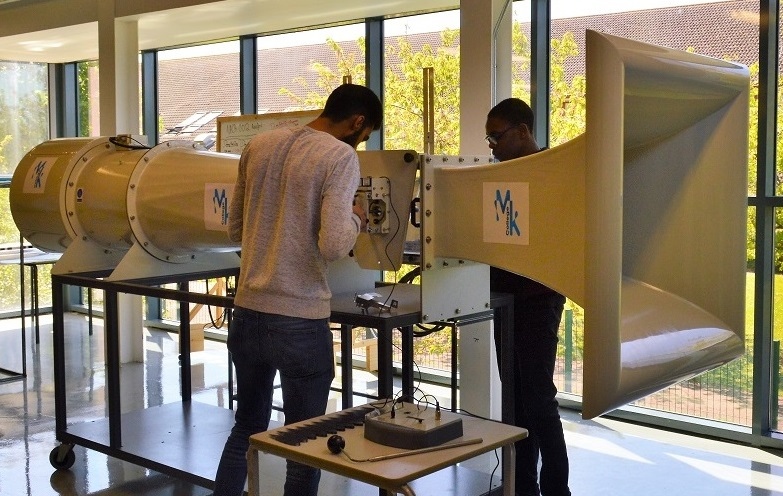
The electronic and aeronautical test facility at Milton Keynes College, UK recently purchased an AF1300 Subsonic Wind Tunnel for the teaching of the Level 3 Aeronautical Engineering BTEC Diploma students, which is used on a regular basis as part of the course.

Addressing the Aeronautical Engineering Skills Shortage

In response to the world skills shortage of aeronautical engineers, in 2016 Milton Keynes College began a dedicated Aeronautical Engineering BTEC. This course, headed up by Sean Hainsworth, former RAF Aerospace Engineer, first began as a trial. Following the course’s success, Milton Keynes College has a full cohort of 40 applicants aiming to start in September 2018.

Wind Tunnel in the Syllabus

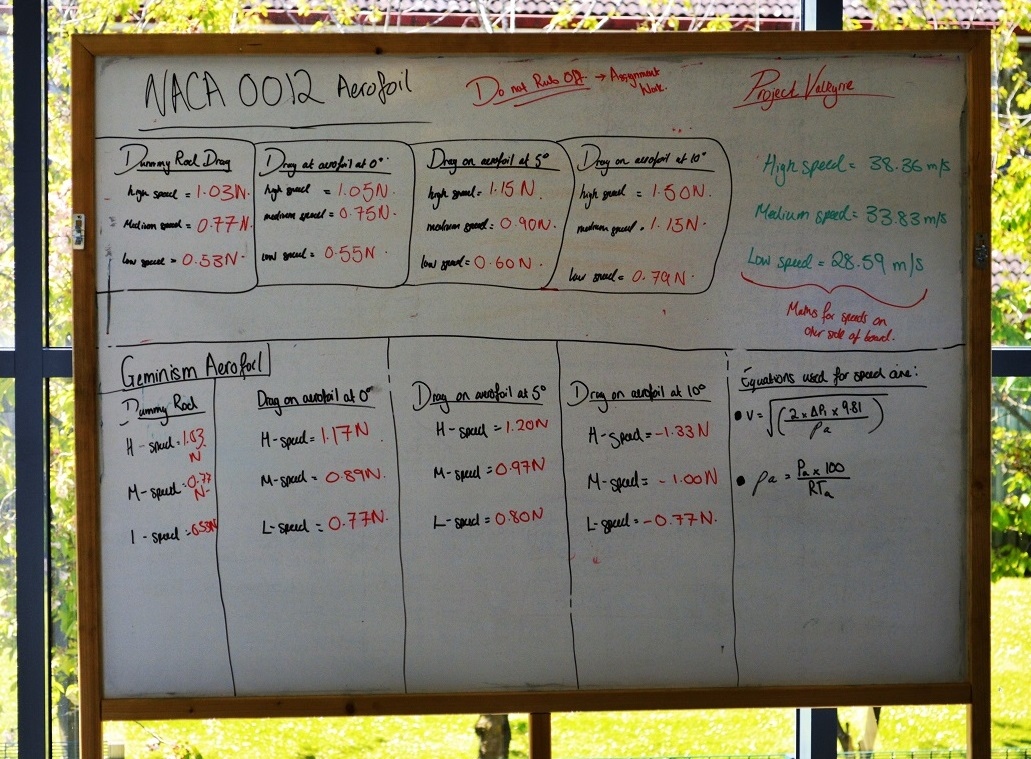
Students are required to complete projects that involve the design, manufacture and test of aerofoils throughout the year. As part of the course, students have a project to design and build three types of aerofoil, testing with three angles in the wind tunnel (0 degrees, 5 degrees and the critical 15 degree stall angle) and then applying three different equations (lift, drag and wind speed).

Pearson BTEC Level 3 Diploma in Aeronautical Engineering

The AF1300 Subsonic Wind Tunnel is used as a standard piece of equipment in specialist aeronautical engineering facilities across the globe. For the Pearson BTEC Level 3 Diploma in Aeronautical Engineering, the equipment utilised for the following learning units:

  • Unit 5 Mechanical Principles and Applications
  • Unit 48 Theory of Flight
  • Unit 68  Principles and Applications of Aircraft Mechanical Science

About the AF1300 Subsonic Wind Tunnel

The AF1300 is a widely used piece of aerospace engineering teaching equipment that allows undergraduate and research students to study the principles of aerodynamics. The compact size reduces space requirements and experiment time compared to full sized wind tunnels, due to the ease of model changeover, of which can be switched with minimal or no supervision. The wind tunnel is available with a range of different models (standard cylinder, NACA standard aerofoils, 3D drag models, flat plate drag models, flat plate boundary layer models with tapings and aircraft models with low and high wing configurations). For more information, click here.

Save & Share Cart
Your Shopping Cart will be saved and you'll be given a link. You, or anyone with the link, can use it to retrieve your Cart at any time.
Back Save & Share Cart
Your Shopping Cart will be saved with Product pictures and information, and Cart Totals. Then send it to yourself, or a friend, with a link to retrieve it at any time.
Your cart email sent successfully :)